A long application is not a long page. This guide covers stages, the right question types, conditions, resources, the window and the preview pass before the public link goes out. With the questions agreed, it takes about twelve minutes.
Related: Applications and the applicant portal.
Before You Start
- The questions, agreed with whoever owns the call. Changing them after the window opens splits your data.
- An honest completion time. Fill the draft form yourself; applicants will take longer.
- The documents applicants need: the call document, a budget template, a consent form.
- The rules: eligibility, the closing date and time, and any cap on applications.
Step 1: Plan the Stages
Open Registration form. The Stages outline on the left lists each stage with its number of questions. Add a stage adds one; drag to reorder, or drop a question on another stage to move it.
Make each stage one sitting with one subject. A structure that holds up for a seed fund:
- About the team: names, institution, roles
- The idea: problem, solution, customer
- Technology and readiness: readiness level, prototype, intellectual property
- Plan and budget: milestones, use of funds
- Declarations and uploads: consent, pitch deck
Put short, easy questions first. Applicants who finish one stage are far more likely to finish the form.
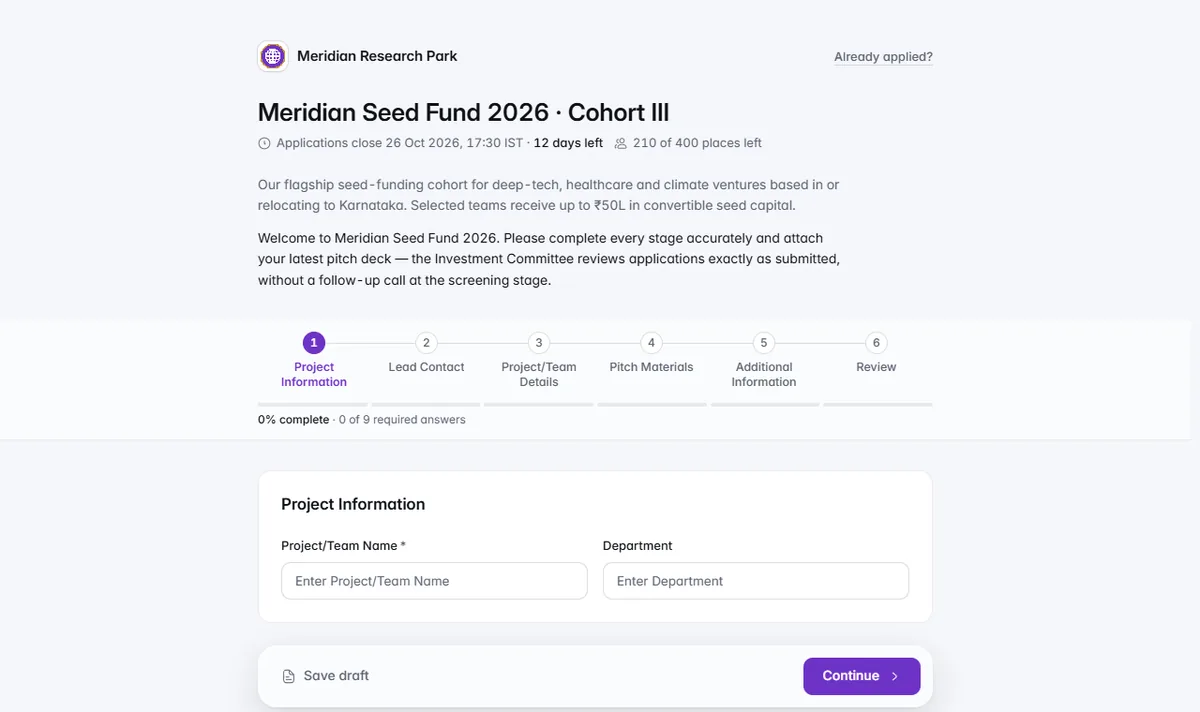
A fresh form can also start from one of nine ready forms, or from a sentence describing the programme with IdeaScore AI.
Step 2: Choose Question Types
Add question offers eleven types and ready-made blocks.
Anything you will report or filter on later should be a structured type. A readiness level typed as a number gives you a chart; the same thing in a paragraph gives you nothing.
Step 3: Add Conditions
Only show this question if… shows a question only to the applicants it applies to: the incorporation number only to registered companies, the co-founder block only when the team has more than one person.
The comparisons are is, is not, is one of, has been answered, has not been answered and, for numbers, greater than or less than (or equal to). Condition on structured answers only, keep chains one level deep, and check the Flow map, which shows every path an applicant can take.
Step 4: Attach Resources
Switch on Resources on the question that needs a document, and attach the file there: the budget template beside the budget question, not on the first page. Name files so they still make sense in a downloads folder.
Step 5: Set the Window and Capacity
From the menu, open Window and settings:
- Opens and Closes set the window; the public form shows closed outside it.
- Accept late submissions keeps the form open for the hours you choose after closing.
- A capacity stops new applications after the number you set, with your message.
- Accepting registrations switches the form on or off at once.
Times follow the programme's time zone, set in Programme Settings.
Step 6: Check, Preview and Share
- Run Form check beside Add question. Apply its fixes, then save.
- Choose Preview as applicant and walk every stage on a laptop and a phone. Answer each condition both ways.
- Each save keeps the form as it was as a version. Use Version history to name one ("Before the jury changes") or restore it.
- Use Copy the form link and open it while signed out.
Once the window is open, treat the form as frozen. Fixing a typo is fine; adding a required question halfway through is not, because earlier applicants never saw it.
Checklist Before You Publish
- Stages in a sensible order, each one a sitting
- Each question using the narrowest type that fits
- Required limited to what you would reject without
- Conditions tested both ways and checked in the Flow map
- Resources attached to the question that needs them
- Window, late submissions and capacity set
- Form check clean, previewed on a phone
- Public link opened while signed out